Proxmox part 1: Installation and Setup
This post will detail how to install proxmox and perform the initial configuration. This is an abbreviated supplement to the main Proxmox install guide
Hardware requirements
- x86_64 CPU architecture (Intel and/or AMD 64 bit)
- VT-x (hardware acceleration for virtualization)
- VT-d or “directed IO”, for PCI passthrough support (optional)
- Wired ethernet for your LAN/WAN
Download Proxmox VE .iso image
Download the latest Proxmox VE release here
Write the image to a USB drive with dd or a tool like
UNetbootin
Install
Boot the USB drive installer in the target machine.
Choose Install Proxmox VE (Graphical)
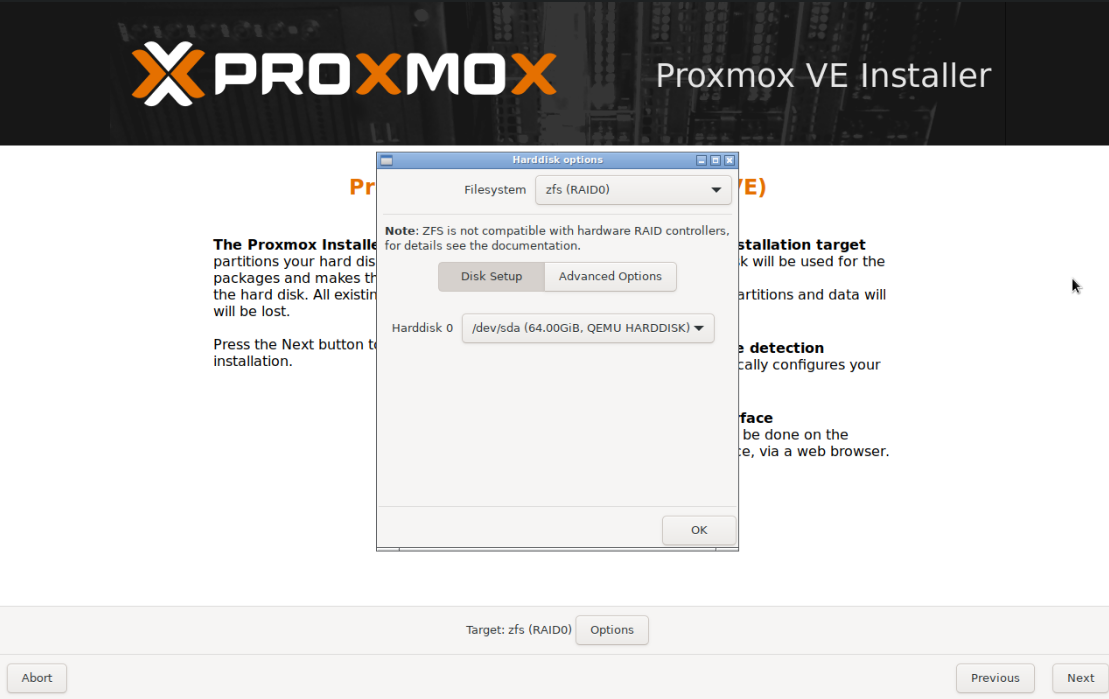
Click the Target Options button, and change the Filesystem:
- If you have one drive, choose
zfs (RAID0) - If you have two drives available, choose
zfs RAID1mirror - If you have three or more, choose
zfs RAIDZ-1.
Use this ZFS size calculator to play around with various configurations.
- Select your Country, Time zone, and Keyboard layout.
- Choose a root password
- Enter your real email address, so that you receive notifications. (TODO: Requires setup of SMTP server later)
-
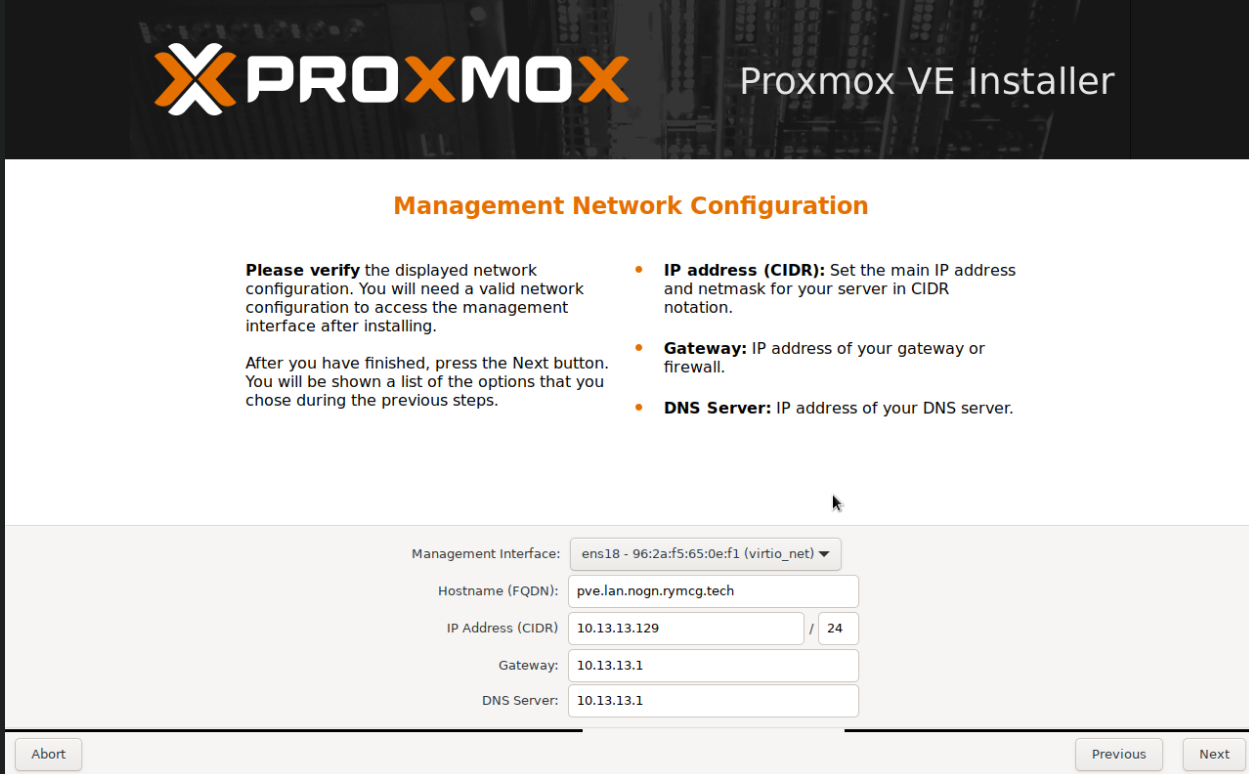
Choose the primary / management network interface (NIC)
-
Choose the fully qualified domain (host) name
-
Set a static IP address (and reserve it with your LAN DHCP server, using the MAC address).
-
Enter the upstream LAN gateway IP address.
-
Enter the upstream LAN DNS server IP address.
-
Finish the installation
-
Reboot
Login to the proxmox dashboard
- Once the machine has rebooted, you will see the URL (and IP address) to access the dashboard printed on the console.
- Load the URL in your web browser, login with the username
rootand the password you chose during installation.
Setup SSH keys and secure properly
SSH is enabled by default, and you can login with the username root
and the password is the password you chose during install. Because
passwords are less secure than SSH keys, that’s the next step: to
install your SSH key, and disable password authentication.
Create an SSH host entry in your workstation’s $HOME/.ssh/config:
PROXMOX_IP_ADDRESS=192.168.X.X \
PROXMOX_HOST=pve \
cat << EOF >> ~/.ssh/config

Host ${PROXMOX_HOST}
     Hostname ${PROXMOX_IP_ADDRESS}
     User root

EOF
(Change the Hostname 192.168.X.X to be the IP address of your Proxmox host.)
If you have not created an SSH identity on this workstation, you will need to
run ssh-keygen.
- From your workstation, run
ssh-copy-id pve, which will ask you to confirm the ssh key fingerprint, and for your remote password (chosen during install) to login to the Proxmox server via SSH. It will copy your SSH key to the server’sauthorized_keysfile, which will allow all future logins to be by key based authentication, instead of by password. - SSH to the Proxmox host, run
ssh pve. Ensure that no password is required (except perhaps for unlocking your key file). You will now be in the root account of Proxmox, be careful! - You need to edit the
/etc/ssh/sshd_configfile. The text editorsnanoandviare installed by default, or you can install other editors, for exampleapt install emacs-nox. - Disable password authentication - search for the line that says
PasswordAuthentication yes, which will be commented out with#. Remove the#to un-comment the line, and change theyesto ano. - Save
/etc/ssh/sshd_configand close the editor. - Restart ssh, run:
systemctl restart sshd - Exit the SSH session, and test logging in and out again still works, using your SSH key.
- To test that
PasswordAuthenticationis really turned off, you can attempt to SSH again, with a bogus username, one that you know does not really exist:
$ ssh hunter1@pve
hunter1@192.168.122.177: Permission denied (publickey).
The attempt should immediately fail and say Permission denied (publickey), and if it
also does not ask you for a password, then you have successfully turned off
password authentication.
Disable Enterprise features and enable Community repository (optional)
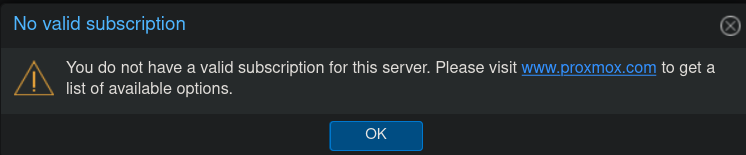
By default, Proxmox expects that you are an enterprise, and that you have an enterprise license for Proxmox. If you do, skip this section. However, you may also use the Proxmox community version, without a license (and it is the same .iso image installer and method for both versions.) To switch between these versions, you must use different apt package repositories.
If you wish to use Proxmox exclusively with the Community, non-enterprise version, run this as root:
## Backup existing sources list for Proxmox
cp /etc/apt/sources.list.d/pve-enterprise.list \
  /etc/apt/sources.list.d/pve-enterprise.list.bak

## Disable enterprise repository by commenting it out
sed -i 's/^deb/#deb/' /etc/apt/sources.list.d/pve-enterprise.list
sed -i 's/^deb/#deb/' /etc/apt/sources.list.d/ceph.list

## Add the no-subscription community repository
echo "deb http://download.proxmox.com/debian/pve bookworm pve-no-subscription" > \
  /etc/apt/sources.list.d/pve-no-subscription.list

## Update the package lists
apt update

## Clear the cache to make the changes effective immediately
systemctl restart pveproxy.service
Setup Firewall
Proxmox has a 3-tier layered firewall:
- Datacenter - priority 3 - most general
- Node - priority 2 - node specific
- VM / Container - priority 1 - most specific
By default the firewall is turned off. To set everything up, run the
proxmox_firewall.sh script, which will reset the firewall rules,
create basic rules for SSH and Web console, and enable both the Node
and Datacenter firewalls:
wget https://raw.githubusercontent.com/EnigmaCurry/blog.rymcg.tech/master/src/proxmox/proxmox_firewall.sh

chmod +x proxmox_firewall.sh
./proxmox_firewall.sh
- This script will delete all of the existing firewall rules.
- Confirm the prompt.
- Enter the management interface:
vmbr0. - Enter the allowed subnet for managers:
0.0.0.0/0(the default allows access to anyone connected through the management interface, but you might want to further restrict this.) - It will enable the firewalls and create new rules for SSH (port 22) and the web console (port 8006).
- You may re-run the script. It is idempotent.
? This will reset the Node and Datacenter firewalls
  and delete all existing rules.. Proceed? (y/N): y

Enter the management interface (e.g., vmbr0)
: vmbr0
Which subnet is allowed to access the management interface?
: 0.0.0.0/0

Deleting node firewall rule at position 2.
Deleting node firewall rule at position 1.
Deleting node firewall rule at position 0.
Allowing ICMP ping response from the management interface.
Allowing access to SSH (22) for the management interface.
Allowing access to Proxmox console (8006) for the management interface.
Enabling Node firewall.
Enabling Datacenter firewall.
The script
#!/bin/bash
## Reset and configure the Proxmox firewall.

set -eo pipefail
stderr(){ echo "$@" >/dev/stderr; }
error(){ stderr "Error: $@"; }
cancel(){ stderr "Canceled."; exit 2; }
fault(){ test -n "$1" && error $1; stderr "Exiting."; exit 1; }
confirm() {
    local default=$1; local prompt=$2; local question=${3:-". Proceed?"}
    if [[ $default == "y" || $default == "yes" || $default == "ok" ]]; then
        dflt="Y/n"
    else
        dflt="y/N"
    fi
    read -e -p $'\e[32m?\e[0m '"${prompt}${question} (${dflt}): " answer
    answer=${answer:-${default}}
    if [[ ${answer,,} == "y" || ${answer,,} == "yes" || ${answer,,} == "ok" ]]; then
        return 0
    else
        return 1
    fi
}
ask() {
    local __prompt="${1}"; local __var="${2}"; local __default="${3}"
    while true; do
        read -e -p "${__prompt}"$'\x0a\e[32m:\e[0m ' -i "${__default}" ${__var}
        export ${__var}
        [[ -z "${!__var}" ]] || break
    done
}
check_var(){
    local __missing=false
    local __vars="$@"
    for __var in ${__vars}; do
        if [[ -z "${!__var}" ]]; then
            error "${__var} variable is missing."
            __missing=true
        fi
    done
    if [[ ${__missing} == true ]]; then
        fault
    fi
}
check_num(){
    local var=$1
    check_var var
    if ! [[ ${!var} =~ ^[0-9]+$ ]] ; then
        fault "${var} is not a number: '${!var}'"
    fi
}
validate_ip_address () {
    #thanks https://stackoverflow.com/a/21961938
    echo "$@" | grep -o -E  '(25[0-5]|2[0-4][0-9]|[01]?[0-9][0-9]?)\.(25[0-5]|2[0-4][0-9]|[01]?[0-9][0-9]?)\.(25[0-5]|2[0-4][0-9]|[01]?[0-9][0-9]?)\.(25[0-5]|2[0-4][0-9]|[01]?[0-9][0-9]?)' >/dev/null
}

add_management_rule_macro() {
    MACRO=$1
    check_var HOSTNAME MACRO MANAGER_INTERFACE MANAGER_SUBNET PUBLIC_IP_ADDRESS
    pvesh create /nodes/${HOSTNAME}/firewall/rules \
          --action ACCEPT --type in --macro ${MACRO} \
          --iface ${MANAGER_INTERFACE} --source ${MANAGER_SUBNET} --dest ${PUBLIC_IP_ADDRESS} --enable 1 \
          --comment "Allow ${MACRO^^} from ${MANAGER_SUBNET} on ${MANAGER_INTERFACE} for ${PUBLIC_IP_ADDRESS}"
}

add_management_rule_port() {
    PORT=$1
    check_var HOSTNAME MANAGER_INTERFACE MANAGER_SUBNET PUBLIC_IP_ADDRESS
    check_num PORT
    pvesh create /nodes/${HOSTNAME}/firewall/rules \
          --action ACCEPT --type in --dport ${PORT} --proto tcp \
          --iface ${MANAGER_INTERFACE} --source ${MANAGER_SUBNET} --dest ${PUBLIC_IP_ADDRESS} --enable 1 \
          --comment "Allow from ${MANAGER_SUBNET} on ${MANAGER_INTERFACE} to ${PUBLIC_IP_ADDRESS}:${PORT}"
}


reset_firewall() {
    confirm no "This will reset the Node and Datacenter firewalls and delete all existing rules."
    echo
    ask "Enter the management interface (e.g., vmbr0)" MANAGER_INTERFACE vmbr0
    ask "Which subnet is allowed to access the management interface?" MANAGER_SUBNET 0.0.0.0/0
    echo
    PUBLIC_IP_ADDRESS=$(ip -4 addr show ${MANAGER_INTERFACE} | grep -oP '(?<=inet\s)\d+(\.\d+){3}')
    validate_ip_address ${PUBLIC_IP_ADDRESS}

    ## Delete existing Datacenter rules
    RULE_POSITIONS="$(pvesh get /cluster/firewall/rules --output-format json | jq -r '.[].pos' | sort -r)"
    # Iterate over each rule position and delete the rule
    for POS in ${RULE_POSITIONS}; do
        echo "Deleting cluster firewall rule at position ${POS}."
        pvesh delete "/cluster/firewall/rules/${POS}"
    done

    ## Delete existing Node rules
    RULE_POSITIONS="$(pvesh get /nodes/${HOSTNAME}/firewall/rules --output-format json | jq -r '.[].pos' | sort -r)"
    # Iterate over each rule position and delete the rule
    for POS in ${RULE_POSITIONS}; do
        echo "Deleting node firewall rule at position ${POS}."
        pvesh delete "/nodes/${HOSTNAME}/firewall/rules/${POS}"
    done

    echo "Allowing ICMP ping response from the management interface."
    add_management_rule_macro ping
    echo "Allowing access to SSH (22) for the management interface."
    add_management_rule_macro ssh
    echo "Allowing access to Proxmox console (8006) for the management interface."
    add_management_rule_port 8006

    echo "Enabling Node firewall."
    pvesh set /nodes/${HOSTNAME}/firewall/options --enable 1

    echo "Enabling Datacenter firewall."
    pvesh set /cluster/firewall/options --policy_in DROP --policy_out ACCEPT
    pvesh set /cluster/firewall/options --enable 1
}

reset_firewall
You can discuss this blog on Matrix (Element): #blog-rymcg-tech:enigmacurry.com
This blog is copyright EnigmaCurry and dual-licensed CC-BY-SA and MIT. The source is on github: enigmacurry/blog.rymcg.tech and PRs are welcome. ❤️